
Siemens and Ultimaker

 |
Siemens has always been synonymous with innovation whose Research & Development is in their life blood. Annually Siemens invest over 6 billion dollars in their Research & Development. |
Jamie McDyre, Head of Freight and Products – ASEAN Pacific, Mobility says “Siemens is moving away from just looking at the factory floor, into considering the whole value chain now, and what that allows us to do, using 3D printing etc, it allow us to bring that process to our customers, and bring them into our design processes early on.”
3D printing allows Siemens to get their customers involved by bringing them into the conversation early and showing them prototypes of the final product. Mr McDyre explains that it is a strategic advantage in engaging with their customers early in the design process and allows them to be able to get their product to market much quicker than before.
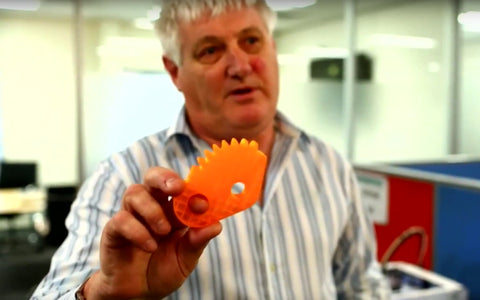
Imaginables met with Stephen Baker, Head of R&D, Siemens Rail Automation at AusRAIL Conference and Exhibition 2015 who explained to us how they were using their Ultimaker 3D printers at Siemens.

“Primarily we use 3D printing to assist us in prototyping for new components and new products” explains Mr Baker. “But when we started using it (Ultimaker), we realised we can use it as part of a manufacturing process”
Mr Baker explains how they start off using lightweight 3D printed plastic components from their Ultimaker and end up with the final product cast in 316 grade stainless steel.
They identified a specialised foundry based in Sydney, who were able to take the 3d printed components printed in PLA, place it into a wax form and then form a ceramic slurry around the printed parts.
 |
 |
 |

|
 |
| 3D printed parts being prepared | Wax form created | Ceramic slurry covering wax elements | Molten steel being poured into cavity of mould in foundry |
Cast in steel out of its mould. |

|
| 3D printed part next to the final 316 grade cast-in steel product. |
PLA is perfect for this process, explains Mr Baker, as it simply burns off during the firing stage which leaves them with a cavity mould for them to cast directly into.
"So therefore we gone from a 3D cad model, to a 3D component, to the final metallic component without having to go through the normal process of manufacturing”
“This has enabled us to reduce our time from the model stage to the final component stage to about a week to 2 weeks, compared to where this would normally take us anywhere between 12 and 16 weeks.”
"The principle saving is time (traditional an average of 10+ weeks per component) and potential rework as one-off prototyping allows us to try designs and elements without investing in expensive tooling" says Mr Baker.
 |
 |
 |
Above, images of a custom switch from design to final product
 |

|
We asked Mr Baker why his team had chosen to work with the Ultimaker.
"We first looked at the market and web reviews, the basic specification was 8” build and sub 0.100mm resolution. The team was then tasked in finding a suitable candidate machine and making a recommendation. Then after about three weeks of investigations, talking to suppliers, getting samples printed (they had shortlisted three vendors), they recommended the Ultimaker 2 as being the most suitable machine within our budget constraints (under $10k) which what they believed would have suitable level of local support." explained Mr Baker.
We found out that Mr Baker is also quite a 3D printing enthusiast both at work and during his free time. Mr Baker shared with us his current project where he has built an InMoov open-source 3D Printed humanoid robot.

Images courtesy of Siemens, Australia.
Disclaimers: The content of the webinars, podcasts, videos, etc contained on, linked by or referred to on this page may have been created and/or owned by the relevant brand owners or other third parties. As such, Imaginables cannot warrant or make any representation as to the content's suitability or reliability.